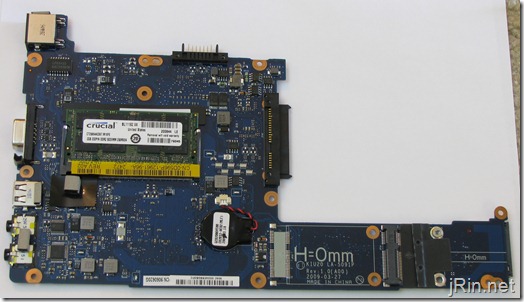
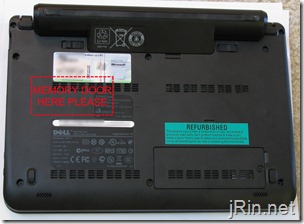
As opposed to simply providing a removable door (like they did for the mini-card) to upgrade the memory, Dell decided to make it difficult by requiring you to dismantle the entire laptop… (but what do I know, maybe it would affect structural integrity or something to add a door?).
So, in light of this fact, here is a step-by-step how-to video (and pictures) on how to upgrade the memory! All you will need is time, a set of mini screw drivers, and patience!
While following this video, I would highly recommend having the Dell created service manual to follow along in case anything shown here is unclear/etc:
http://support.dell.com/support/edocs/systems/ins10v/en/sm/memory.htm#wp1180987
Since YouTube caps videos at 10 minutes, I broke it up into:
Taking it apart and adding the memory:
and then another putting it all back together:
Or, or those who prefer a guide using pictures as opposed to video:
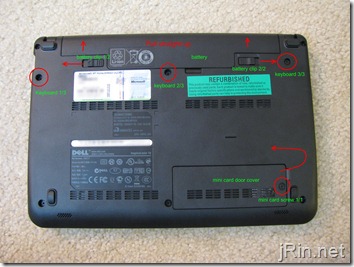
1. Start out by removing the battery by sliding out the battery lock clips, and then pull the battery straight out. Then remove the (3) screws holding in the battery and the (1) screw securing the mini-card door, and remove the door.
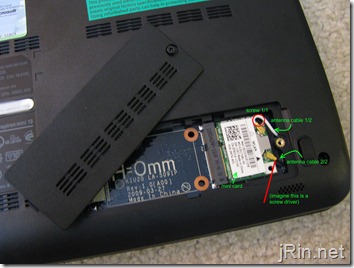
2. Remove the mini card. Gently pry off the two antenna cables by, for example, placing a small screw driver underneath the cables where the gold metal and cable meet – then softly prying it up. Then, remove the single screw holding the mini card down, then pull out the card.
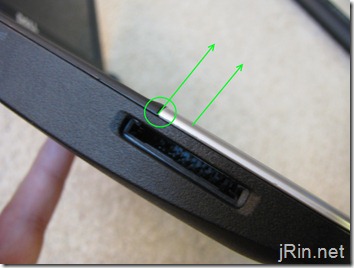
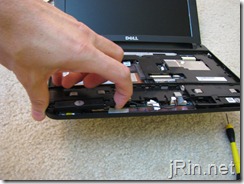
3. Remove the keyboard and it’s ribbon cable, as well as the ribbon cable for the touchpad. You’ll need to basically use a very thin flat head screwdriver, credit card, etc in order to ‘pry up’ the keyboard from the center near the screen. Once you are able to get your fingers underneath it, just pull up on the right and left sides until the laptop is free: 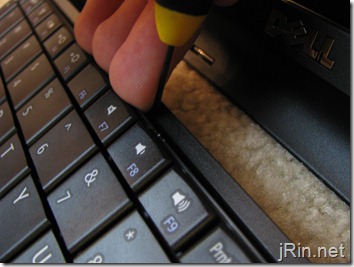
(there are small clips holding the eayboard in on the right and left, just pry the keyboard up as if there is a hinge at the palm rest and it’ll come loose). Don’t pull the keyboard too far from the chassis as it’s still connected via it’s ribbon cable: 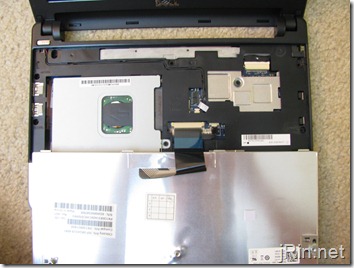
With the keyboard free, remove the ribbon cable(s) by sliding out the left and right grey “clips†holding the ribbon cable(s) in. (they will “slide out†about 2mm or so) 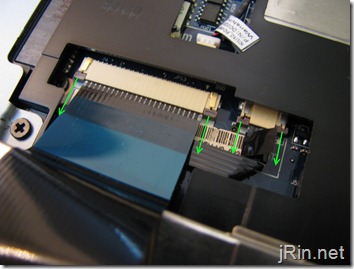
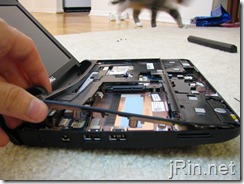
4. Remove the palm rest. This can be a bit frustrating, but basically you want to use your thumbnail / thin creditcard to start prying from the left and right edges, where it meets the bracket:
5. Prep for palm rest bracket removal. First, go ahead and remove the 1 screw holding in the hard drive, and slide it out (blue). Then, unplug the 3, or 4 if you have bluetooth, cables (green). Finally, unscrew the 4 screws securing the palm rest bracket from the top (red). 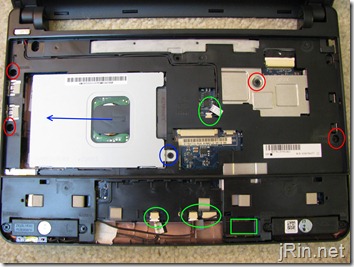
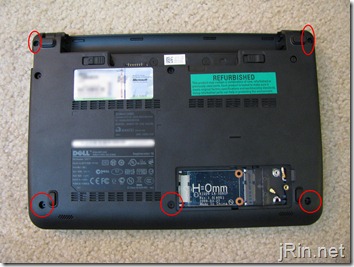
Turn the netbook over and remove the 5 remaining screws securing the palm rest from the bottom:
6. Actually remove the palm rest bracket. Dell suggests starting from the hinges and working down, but I was unable to undo the clips here to start. So instead, I started at the speakers (which are already loose), and started prying off the bracket from here. Basically, just start pulling the entire bracket up, working your way from the palm rest area up towards the hinges, until it is removed. (that being said, once I started getting the bracket unclipped half way to the hinges, I was able to pry off the hinge-area):
7. Prep system board (motherboard) removal. Almost there! Now you need to unplug the 3 remaining cables (green) and 2 screws (red). It may not matter, but when removing the display cable (top right), pull from the middle of the cable, as that’s where all the wires are bunched: 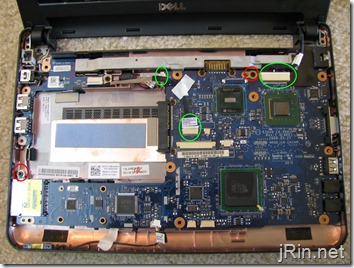
8. Remove the motherboard. The board is now completely loose from the chassis and can be removed! Be careful not to nick it on anything while pulling it off, but it’s relatively easy not to. Flip over the board, release the memory and pop in your 2GB stick:
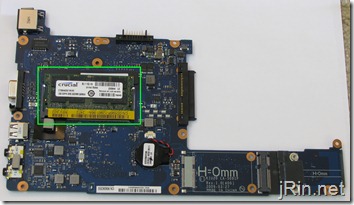
9. Put everything back together. Basically, just follow all theses steps in reverse, power on the system, and enjoy your 2GB Dell Mini 10v!
Have any questions or run into problems? Find an easier way to pry apart the palm rest bracket or etc? Let everyone know in the comments!
For those of you who haven’t bought a 2gb stick yet, there are plenty on amazon that would work fine (too bad prices for ddr2 memory aren’t as cheap as they used to be) – I will keep this list updated with the cheapest amazon memory prices as I see them:
And for those interested in the products I used to help create this post:

Thanks you for a wonderful post. 20mins. not a scratch love snow leopard.
Worked like a dream.. THANKS!!
Sweet post. Thanks for being so thorough!
Just finished the install. Thanks for great step by step instructions.
Just did the upgrade, these instructions worked very well. I used old iTunes cards to help pry the components apart.
I am seriously tempted to just use my Dremel and cut that memory door into the back of my Dell 1011. Has anyone tried this?
Thank you, just upgraded to 2G following your step by step instructions.
Thank you very much for this post. Ram installed and laptop is functional!
thanks would have been like playing a video game with out your help works fine but the power cord is not working. any ideas did i forget to reconnect something?
hey do you know if i can upgreade my mini nickelodeon edition it has 1g -160hard drive memory , dont want to tacke it apart for no reason
James,
Thank’s a lot for your help an this great post.
Regards from Mexico City.
Pingback: How-to: Upgrade Dell Mini 10v Memory « Everything Express
Pingback: How to upgrade the Dell Inspiron 1121 (11z) | jRin.net
Just like to add my “thanks” for this well-written guide. Pics very useful too. Much appreciated :)
once the motherboard is removed, is there any thing between it and the back cover? I too am leaning to use my Dremel.